\

Ready to Learn How to Create the Perfect Video Hook?

Hook Your Viewer in the First Three Seconds Of Your DIY Video

Did you know three to five seconds is all it takes before someone clicks away from your video content? 

When it comes to video creation, you’ve got to jump right in there with a memorable hook!

When it comes to video creation, you’ve got to jump right in there with a memorable hook!

Don’t give them the chance to change the channel and never look back. If you don’t want to miss out on the engagement or the conversions you're hoping to gain from your video marketing, you’ll need to be intentional about video engagement and hooking your audience in this narrow window of time.

There are a number of ways you can hook your audience with those DIY videos, but before you hit record, I'm going to give you four quick tips that you can use today.

Tip #1: Strong Video Engagement Means Not Wasting Time

First off, don't waste time telling them who you are. Save that for the title and description. 

If I started my video content with "Hi, my name's Farran Tabrizi, owner of Tabrizi Productions and creator of 30 Minutes to Better Quality Video,” I’ve just spent five seconds on info you probably already knew when you clicked on that DIY video. So don't waste time with the small-talk and niceties, and just get straight to the point. 

Strong visuals are great… But you’re not going to inspire viewers without a strong script to support it.

Strong visuals are great… But you’re not going to inspire viewers without a strong script to support it.

Tip #2: Strong Video Engagement Means Asking Good Questions

Ready for the second thing you should know about how to create an online video that nails engagement? Understand the power of a good question.

For example, because I want to reach people who are looking for ways to up their video marketing game, I might start with, "Do you ever wonder why your videos don't convert into newsletter signups on your website? That might be why you're here watching this video today." The reason this works is because when we hear a question, we can’t help but want to know the answer. You’ve just stoked your viewer’s curiosity.

Starting your video with a line like the one above will also confirm to the viewers of your DIY video that they're in the right place from the very beginning. That’s going to improve the chances that they stick around for the rest of the content.

Tip #3: Strong Video Engagement Means Appealing To Emotions

Third, find and address a pain point your viewer deals with in order to evoke some sort of emotion. You can do this with your video content creation by painting the picture of an obstacle that your audience can relate to and then offering them some sort of solution.

For instance, to reach my specific audience I could start a video with, "Do you spend too much time planning and creating a DIY video only to put it out to the masses... and receive one comment from your mom?” If that's happened to my viewers before (and it’s certainly happened to me!) it makes them want to stick around and find out how I’m going to help them solve this.

Tip #4:  Strong Video Engagement Means Entertaining and Educating

On to point number four: start with an interesting or shocking fact that relates to the video topic.

Rather than burying the lead by spending time on fluff, start strong. People want to be entertained or educated as they're scrolling through Instagram or watching videos on their other media accounts--and this is a great way to do it!

Create video content ideas that pack a punch & leave a memorable impression!

Create video content ideas that pack a punch & leave a memorable impression!

If I’m trying to convince someone they need to take their video content marketing more seriously, for instance, I might start with the fact that in 2020, Instagram users spent an average of 30 minutes per day on the platform--four more minutes than they did in 2019. This manages to peak my viewers’ interest while also showing them I’m a knowledgeable resource. And that’s going to keep them listening!

Alright... now it’s go time. Start putting these techniques to the test and watch as you start gaining more engaged viewers. You’ve got this!

If you like what you’ve heard and you want to learn more about how to create video for Instagram, Facebook, TikTok, or Youtube, then don't leave without signing up for more "quickie" video tips, course content and exclusive video coaching offers that will give you the confidence to do it on camera.

DIY Video Hacks: Backgrounds on A Budget

No need to rent a studio space… create professional backgrounds at home instead!

How many of you are shooting out of a home office? Or if not an office, maybe a spare bedroom or a quiet corner of your house?

There’s no shame in that. In fact, I do it all the time. You can absolutely create professional videos with pro backdrops from your own home.

Plus you can take some of the money you’ve just saved on not renting a studio space and invest it toward items that will help dress your set and represent your brand. We’ll get back to decorations in a sec, but first let’s talk setup so you can really start utilizing that background space well.

pexels-emre-can-acer-2079246.jpg

You don’t need to film in a studio to create professional video content.

Setting Up

First things first. More space is not necessarily better. Aim for no more than eight to ten feet of space behind you. More than that opens you up to more distractions in your background… like your dog speeding by.... or your kids chasing after the dog... or your husband chasing the kids chasing the dog. You get the picture.

Now that you have your place, position your camera. I have a whole video on framing and composition you can reference for this so make sure to check that out.

Also pay attention to the windows behind you. This is my biggest pet peeve, and I see it happen all the time. Never have a window behind you… unless you want to become a silhouette. In which case, go right ahead.

Lastly, tidy up your space. No one wants to look at your dirty coffee cups, lunch plates, and crumpled laundry. Avoid hanging cords too.

Embrace Colors

We've all seen enough zoom calls with the classic bookshelf background. Yes, it’s impressive you have lots of books--and I'm sure you've read all of them--but we're a little bit more creative than that. So let's add some personality and life to your backdrop!

Here’s a backdrop I worked on with one my clients… I just love how it came out!

Here’s a backdrop I worked on with one my clients… I just love how it came out!

Let’s start with color. When you're using a phone or webcam as your camera, that's fine, but it's hard to make a white wall behind you look pure white. 

Why? Essentially the white balance gets messed up and makes it look yellowish, bluish, or creates a burst of light, like a halo behind you, if you’re using an extra light source, like a ring light.

For this reason, avoiding a plain white wall is best. Consider slapping some paint on an accent wall in your house that matches your brand. (As you can see, that's what I did here.)

I realize not all of you can paint your walls. No worries. Maybe you add just a nice large piece of art to your background. 

Feng Shui that Setup

Which leads us to another facet of interior design… all the fun little decorations!

shelves.jpg

Shelves with a few objects creates that perfect amount of minimalist chic.

Do you have a door in the background or a window you can’t avoid? Then consider hanging a curtain. Having one over the door will give the illusion of a window--as long as it’s not sheer.

I’m also a big advocate for floating shelves. They're clean, minimalistic, and you can add and subtract decorative items with ease. When placing these shelves, make sure they're not so high up that they're going to be out of your shot (especially if you're sitting down). 

Once you have those shelves, it's nice to have things on them that are at varying heights. If you already have a bookshelf behind you, consider subtracting some of the books and replacing them with intriguing pieces like a candle or an air plant.

But before you start enthusiastically throwing a bunch of decorations or props in the background, think about something that ties back into you and your brand. 

Here’s my personal backdrop!

Here’s my personal backdrop!

As you can see behind me, I've styled my space to incorporate the colors of my brand’s palette. That was no coincidence! 

Maybe you want to display some awards or diplomas. Add some life to your background with plants. Even fake plants add life. (On camera, you won’t be close enough to tell they’re not real.)

So get creative! Infuse your personality! It'll make all the difference and people will notice.

If you like what you’ve heard and you want to learn more about how to create video for Instagram, Facebook, Youtube, or TikTok then don't leave without signing up for my * newsletter * to gain more "quickie" video tips, course content and exclusive video coaching offers that will give you the confidence to do it on camera.

Lit Videos: How To Get The Most Out of Your Ring Light

DIY Video Lighting Terms To Know: Fill Light, Natural Light, Ring Light

All right, so you bought this ring light because it's all the craze for creating videos. You set it up and you're wondering why it doesn't look as great as you thought it would.

There’s a wrong way to use a ring light… Do you know how to work your angles and environment to achieve that studio lighting?

There’s a wrong way to use a ring light… Do you know how to work your angles and environment to achieve that studio lighting?

Ring lights, also commonly known as glamour lights, are meant for up-close shots to help remove any lines or shadows when you create video content. They've become increasingly popular to the general public for video conference calls, influencer videos, and people just like you. 

Why? For starters, they're inexpensive. They also happen to come with this handy dandy tripod that you can pop your phone into the middle of--but they’re not perfect. Most affordable ring lights emit a pretty small amount of light in terms of filling up a room. So relying on it solely to achieve that studio look just isn’t going to happen. 

But hold up, don’t chuck your ring light in the nearest trash can just yet. To achieve the best lighting for video content, all you have to do is learn how to use a ring light in correlation with other factors, such as your environment. Here’s how to set yourself up for success:

Ring Light + Fill Light = Studio Look

I want to introduce you to the concept of a fill light. In studio production, we always use a fill light to compliment our primary light (or key light). But you don't necessarily need to go out and buy another light to do this. Simply use natural light.

How to create an online video with ideal lighting: ring light + fill light

How to create an online video with ideal lighting: ring light + fill light

If you're shooting video content in the daytime and have a window in your space, use it to your advantage. This will fill out everything else the ring light can't quite reach.

Why is this important? It will eliminate unwanted shadows and prevent you from looking like you're undergoing questioning in an interrogation room... Unless you’re going for the mobster movie look. In that case, go right ahead.

For the rest of us, I recommend making sure the window isn’t directly behind you. Your ring light is simply not powerful enough to counter that stronger light source, meaning you will be silhouetted.

A Few More Video Lighting Thoughts

Now I hear some of you saying, “But Farran, we’ve seen some of your recent videos and in some of them, you have your window behind you.” Fair point. But that’s because I'm using studio lights, so I can get away with it.

In your case, however, I recommend having the window either to the front or side of you. If it's not in the shot, it shouldn’t overpower your ring. 

… But if your window gets a lot of direct sunlight, and you’re still getting washed out, block the window with a sheer cloth or light-filtering curtain. 

One last thing: if you’re going to use natural light, be mindful of the time of day you're shooting. The last thing you want is to achieve the perfect lighting… only to have the light change noticeably as the sun sets. Because then, your shots aren’t going to match when you’re editing video footage later.

In summary, never rely solely on a ring light for video, use a fill light, and avoid shooting against a window. Look awesome and make that paper.

If you like what you’ve heard and you want to learn more about how to create video for Instagram, Facebook, Youtube, or TikTok then don't leave without signing up for my * newsletter * to gain more "quickie" video tips, course content and exclusive video coaching offers that will give you the confidence to do it on camera.

DIY Video Hacks: The Laptop Teleprompter Trick

How To Read Lines For Video With Your Own DIY Teleprompter

Reluctant to invest a bunch of money in a pricey teleprompter for your video content creation, but intimidated by memorizing all your lines? Not to worry, you already have your own DIY teleprompter!

There’s a nifty little setup hack that will help you navigate this bottleneck and have you running through your script so smooth the local TV network will want to poach you. This simple and savvy trick requires a little bit more setup and tweaking to get it dialed in, but once you’re good to go, creating video and reading those lines will be smooth sailing.

Keep forgetting your lines? Video content marketing on a budget? Try out this DIY teleprompter before you go out and buy new equipment.

Keep forgetting your lines? Video content marketing on a budget? Try out this DIY teleprompter before you go out and buy new equipment.

Right. To get started, you’re going to need a camera (hopefully you knew that already), plus a tripod, a stool, a stand or tabletop (to prop your laptop on), and a wireless mouse. Ready? Let’s start setting up.

The Setup

When you’ve got everything you need, you'll want to set up your camera so the lens is slightly above your eyeline, almost tilting down. 

Next, line up your prompter (aka your laptop) below your camera lens. You'll want this pretty darn close, so that it's almost in the shot… but don't let it be in the shot. Use a stool to prop it up, then pull out those old textbooks or encyclopedias you have lying around to adjust it to that perfect height. If you're doing this often, you may want to invest in one of these cool laptop stands.

Okay, so now you've got your camera on your tripod with the prompter right below… Next, you'll want to open up the document with the text you’ll be reading from. Size it up so your text is easily readable, but not so much so that you're having to scan five lines just to read one sentence. If you do that, it’s going to force your eyes to dart up and down as you scan (which will be pretty noticeable to your audience).

To give yourself more space on your screen, also make sure to minimize or remove any toolbars up top.

Lastly, get that wireless mouse set up next to you (but out of the shot). This will work best if you're shooting mid-bust and up. I like to keep my mouse right by my side, so I can scroll along through the text at my own speed.

Practice and Make Adjustments

Now try out a few test runs by reading the first paragraph or two. How’d you do? If you can tell that you're reading or if you’re looking too far down, make some adjustments to the positioning of your prompter or size of your font. Afterall, you want to create video content with as much ease as possible. 

Here’s what my setup looks like!

Here’s what my setup looks like!

Now I'm not going to lie, this setup is going to take a little bit of time and tweaking to get just right. Video creation should be a painless process so easing your way with some preparation, will benefit you in the long run.  

And once it's all set up, it's done! You'll be able to get through scripts with little to no cuts, which will mean little to no editing… which we like because it saves us tons of time so we can work on more scripts and create more quality videos!

X Marks the Spot

I assume most of you won't be shooting from a studio space, so here’s one more trick that will save you quite a lot of time in the long run.

Take some masking tape and mark off the spots where your equipment has been set up (and snap a few reference photos while you’re at it). That way, when you set up the next time, you’ll know exactly where to put everything. Not only does this speed up your setup process, but it’s good for the continuity of your videos, streamlining the look and angles so one looks the same as the next.

You’re All Good to Go!

And that's it! With a little bit of positioning and practice, you'll be churning out those scripts in no time. Now go out there and wow your friends with your video marketing prowess.

If you like what you’ve heard and you want to learn more about how to create video for Instagram, Facebook, Youtube, or TikTok then don't leave without signing up for my * newsletter * to gain more "quickie" video tips, course content and exclusive video coaching offers that will give you the confidence to do it on camera.

4 Ways To Frame a Flattering Shot

Nail Your Video Composition with These Techniques

The classic centered, straight on shot… not too close, not too far away!

The classic centered, straight on shot… not too close, not too far away!

Both cinematographers and photographers will tell you the importance of framing your shot well. A simple adjustment to your camera angle could make the difference between video content that distracts viewers and video content that focuses your audience on what’s most important: You!

To ace that composition and create video content that shines, it’s good to have a few camera framing techniques in your back pocket. Here's four pointers on dialing in your perfect shot.

Framing Your Shot

Frame your shot too low and you’ll end up with a double chin. You can do better!

Frame your shot too low and you’ll end up with a double chin. You can do better!

Framing your shot is the first and most basic technique you can learn to frame and create videos like a pro. And since we're focusing on you, the talking head, we're going to start with a centered, straight on shot (much like the screenshot I’ve included on the left).

First, you’ll want to place your camera lens at or slightly above your eyeline. Many people have the habit of setting up their camera too low especially if they're using a laptop on their desk. This can give you an unflattering double chin… We definitely don't want that.

High shots will make you seem small and vulnerable.

High shots will make you seem small and vulnerable.

That said, if your shot is too high and pointing downward, you'll look small and vulnerable. Think of the camera lens as the eye of your viewer. Really high angles will give them the impression that they’re considerably taller than you and, as a result, make you seem less authoritative.

So play around with your camera a bit until you find that perfect eyeline shot for your DIY video.

Headroom

Let's move on to another important element of aesthetic composition: headroom. This refers to the space between your head and the top of the screen frame.

Too much headroom makes you seem like you’re sinking out of the frame… Where are you trying to go?

Too much headroom makes you seem like you’re sinking out of the frame… Where are you trying to go?

If you have too much headroom in your DIY video, it’s going to look like you're sinking out of the frame. And just like high camera angles, it’s going to make you appear much shorter.

However, if you have too little headroom in your video, then you risk cutting off the top of your head. For professional video marketing or any other kind of quality video content creation, that’s not going to make your brand look poised and polished.

But before you place yourself right at the center of your screen, go ahead and read this next technique...

The Rule of Thirds

… Just don’t cut off the top of your head either.

… Just don’t cut off the top of your head either.

If you take away anything from this blog post, this video composition strategy is the technique to put to use. To apply the Rule of Thirds, you need to figuratively divide your screen into a grid of nine imaginary squares.

Okay… now avoid placing the main subject of the frame within that center square.

Why do we do this? It sounds odd, but for whatever reason we find it aesthetically pleasing. Our eye is naturally drawn to “power points” along the lines of the squares. This also creates a well-balanced amount of negative space (those places in the frame left intentionally blank).

For talking-head style videos, the trick is to center yourself, while making sure your eyeline is on or near the line of the upper third section.

Applying the Rule of Thirds to the horizontal lines

Applying the Rule of Thirds to the horizontal lines

The Rule of Thirds applies to both the vertical as well as the horizontal. So if you're planning to edit and show text on screen, shift yourself over to the right (or your viewer’s left) to make room for that info.

Distance From The Camera

Okay, but how close do you want to be from your camera when creating videos? 

I'm going to say somewhere between a medium to a closeup shot. I’m not talking an extreme closeup here. And the reason for that is something I learned from researchers studying Zoom fatigue.

So recently I found out that when we see a face that is overly close to the screen, it triggers a fight-or-flight response in our brains. That’s because it doesn’t match up with our typical personal space boundaries. If you were standing that close to a person on the street, you're either about to hug them, kiss them, or punch them.

Extreme closeups will make your viewers uncomfortable… Avoid getting up in their faces!

Extreme closeups will make your viewers uncomfortable… Avoid getting up in their faces!

With that in mind, respect your viewers’ personal bubble and aim instead for a conversation distance. Ask yourself how close you would stand to a friend in a conversation.

An artificial light source (like a ring light) should also impact camera distance. Be sure you're not so far away from the camera or the light that it's ineffective… but don’t get so close you completely wash yourself out.

Finally, if you're shooting in a room in your house that has a lot of stuff in the background, opt for more of a close-up with a tighter shot to crop out those distractions. 

A Final Note on How To Create An Online Video By Framing A Flattering Shot

Let’s end with a comfortable closeup! So much better, right?

Let’s end with a comfortable closeup! So much better, right?

With a little practice, these video creation techniques will become second nature to you. However, while you’re getting familiar with framing your shots, it might be a good idea to make a checklist and have it somewhere nearby while you shoot.

Do a couple test runs, see how it looks, and when you like what you see, give it a go. You’ll be creating video content like a pro in no time!

If you like what you’ve heard and you want to learn more about how to create video for Instagram, Facebook, Youtube, or TikTok then don't leave without signing up for my * newsletter * to gain more "quickie" video tips, course content and exclusive video coaching offers that will give you the confidence to do it on camera.

The custom Thumbnail: why it matters

Why you really should create custom thumbnails for your video content

We’re told not to judge a book by it’s cover or a film by it’s poster… But let’s be honest, we’ve all done it. Which is why, if you really want to get serious about your video content creation, you need to invest an extra minute into customizing your DIY video’s thumbnail.

Good video content marketing means paying attention to the details… yes, even the thumbnails!

Good video content marketing means paying attention to the details… yes, even the thumbnails!

The Thumbnail… And Why It’s Important To Video Creation

You might be asking, what's a video thumbnail? And why should I care about it?

Good question. The thumbnail is that small preview image people see before they click on your video… And if you want them to click on it, you’ve got to make it enticing.

First impressions are important. With attention spans shorter than ever, and people consuming content like cotton candy, you shouldn’t settle for the randomly generated preview thumbnail that YouTube, Facebook, or Instagram suggests after your video uploads.

When media platforms choose your thumbnail, they aren’t making a strategic choice. It’s completely random. And if your video is mostly of you talking, chances are you're gonna end up with this really weird freeze frame.

Ready to learn how to create an online video with intriguing thumbnails? Intentionally choosing an image is your first step.

That picture of you mid-blink with your mouth hanging partially open isn’t exactly your best look, let alone one that establishes you as a video marketing professional in your audience’s mind. On the other hand, when you’re intentional with that thumbnail image, you can inspire curiosity as well as give them a sneak peak of what’s in store.

Seeking inspiration for better thumbnails? I’ve got you covered.

Techniques for Better Video Thumbnails

When you choose your own video thumbnail rather than the one randomly selected by YouTube, you get the chance to put your best foot forward. So tell your prospective viewer as much as possible, pique their curiosity, or evoke some sort of emotion.

There's a few ways you can go about doing this.

If your video is about a dog rescue nonprofit, you might want a screencap of a cute rescue pup rather than, say, the director of the organization. Fuzzy little Fido will tug on your viewer’s heartstrings. 

If it's a product video, you should pick an eye-catching image of your product. You might also opt for a sweet action shot of someone using it.

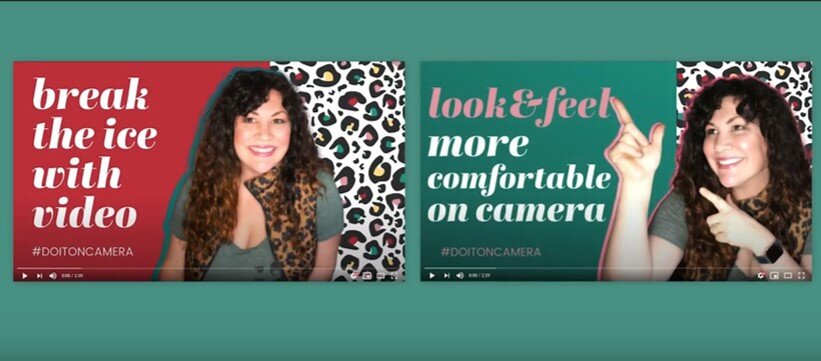
Here are some graphic and text overlays I was able to create with a nifty platform called Canva!

Here are some graphic and text overlays I was able to create with a nifty platform called Canva!

However, if your product is more an idea rather than an object—think services, education, or coaching—you want to craft an intentional thumbnail. Choose a shot of you with a big smile or another attractive pose. Your face is the brand, so make it count.

If you have a series of videos that all look really similar, I suggest adding graphic or text overlays to distinguish one from the next. There are some helpful (and free!) video thumbnail makers out there with online templates to assist with this process.

Uploading a Custom Thumbnail

Next, you might be asking, how do I upload a custom thumbnail? The technical side of creating video thumbnails is really simple, and it's pretty similar across all platforms.

Once your video is uploaded, you should see the randomly selected photo in the thumbnail category. In the same area, there should be a menu option to customize.

Customizing thumbnails is the way to go!

Customizing thumbnails is the way to go!

This will allow you to either pick a different freeze frame from your video or upload your own. If you have the time, I strongly suggest uploading your own because you'll have the opportunity to brand it. Most of the time, the quality of the image is far superior to the random freeze frame.

Another thing you should keep in mind is that some platforms only allow you to customize your thumbnail when you're uploading video content, and not after it's been published. Though Tiktok and Facebook allow you to change the thumbnail after posting, Instagram won’t!

A Final Note on Video Thumbnails

I hope this post encourages you. Choosing a good thumbnail for your video content doesn’t have to be an overwhelming or time consuming process. A little effort goes a long way. You’ve got this.

If you like what you’ve heard and you want to learn more about how to create video for Instagram, Facebook, Youtube, or TikTok then don't leave without signing up for my * newsletter * to gain more "quickie" video tips, course content and exclusive video coaching offers that will give you the confidence to do it on camera.

Eye-Catching Videos: 3 Steps To Look Comfortable on Camera

Slay That DIY video content with these confidence boosters

Afraid of not looking like you know what you're doing on camera when making those DIY videos? I get it. It's not natural to talk to a lens, so don't beat yourself up over it.

Create video with confidence with these easy steps ;)

Create video with confidence with these easy steps ;)

But don’t stop there! That content creation block is definitely something you can overcome with a little practice and preparation. And repeating three little words will make the world of difference when you want to learn how to be comfortable on camera: write, recite, ignite. 

Let’s break those down and what they mean for your video content creation, shall we?

Write: Creating Video with Intentional Content

First, you’re going to want to prepare a script beforehand. I can not stress this enough. Some argue an outline is enough… but in my own experience, it’s really not.

Being on camera and figuring out how to make good videos is already a steep learning curve. Your mind is already processing a bunch of new things simultaneously: framing your shot, checking your sound, hitting record, keeping up your energy from start to finish, even reminding yourself to smile… or breathe. The last thing I want you to worry about is what you're going to say when the light turns red.

Even if you don't recite the script verbatim, putting your full thoughts on paper will help your video marketing material really soak in. And when that happens, it’s going to be so much easier to deliver that content on camera.

Recite: How to Create an Online Video with Confidence

young-woman-filming-vlog-in-kitchen-MC3AH3A.jpg

Tip #2 on how to create video content: recite your content until it flows

Now that you've written your video content ideas down, it's time for you to recite them. Practice reading your script out loud—to your mirror, to your pet, to your lamp. Whoever’s on hand really!

This is essential because most of the time our writing style doesn’t sound the way we talk. It almost always requires some fine tuning to take that formal way of wording things and make it sound more... comfortable and lived in. So if you keep stumbling over the same sentence, rewrite it until it rolls off the tongue effortlessly. 

Another surefire way to make sure your video content sounds natural is by reading it to a friend or a family member. If at any point they don’t understand something or they start spacing out, make note and adjust accordingly.

While you're reading, you’ll also want to make note of where you naturally pause. Chunk out your text at these breaks, so that when you start filming your video content, you can easily work on one paragraph at a time per take. Breaking your script into bite-sized pieces will make the whole process less overwhelming. And if you mess up, it’s no big deal to start over at the beginning of that chunk.

Ignite: Warming Up

Now it's time to ignite. And what I mean by this is that you should take the time to warm up.

Have you ever woken up in the morning only to sound like you spent last night smoking an entire pack of cigarettes? Yeah, we don't want that.

I absolutely love watching my clients gain confidence!

I absolutely love watching my clients gain confidence!

So warm up your vocals and body by doing some basic stretches and vocal cord exercises. Heck, go sing in the shower! 

And don’t forget to drink plenty of water before, during and after filming. Professional musicians and athletes warm up before performances, so why wouldn't you?

Final Thoughts on Bold, Natural Video Creation

So don’t forget: write, recite, ignite. If you practice these three things, you’re going to see a noticeable difference in how natural you look (and feel) in your videos. You can learn how . You absolutely can do it on camera!

And one last thing before you go: don't get hung up on perfection. This is a skill like any other that gets easier with time. One quote I’m always repeating to myself is, "Practice doesn't make perfect. Practice reduces the imperfection." 

So breathe, smile, and create that content with confidence!

If you like what you’ve heard and you want to learn more about how to create video for Instagram, Facebook, Youtube, or TikTok then don't leave without signing up for my * newsletter * to gain more "quickie" video tips, course content and exclusive video coaching offers that will give you the confidence to do it on camera.

Break the Ice: Why You Need To Start Those DIY Videos

Stuck on content creation? You Have What It Takes To Create an Online Video!

Is it just me or does it feel like everyone and their mother wants to create video content? 

Up your Instagram game with engaging DIY videos

Up your Instagram game with engaging DIY videos

Whether it's YouTube, Facebook, Instagram or the latest TikTok craze, it seems like everyone is upping their video creation. Why? Because people are watching it! In 2021, it's expected that people will watch a hundred minutes per day of online video.

It also resonates with audiences. Video marketing researchers have found that social media posts with video content get 48% more views than posts with just images or text. Viewers also retain 95% of messages in video form, compared to only 10% of messages read in text.

Add to these stats that YouTube is the second most popular website after Google and you’ll start to understand why video content creation is such a huge deal.

Time to learn how to create an online video with pizzaz!

Time to learn how to create an online video with pizzaz!

Now, I'm not saying all content is good content… We’ve all come across more than a few sloppy DIY videos. But there's something to be said about the fact that people are taking so much time out of their days to watch video.

Are you one of the many who want to find out how to create an online video for your business or brand, but have felt a bit daunted by the whole process? Maybe you’re intimidated by the expense of equipment or you’re a little camera shy... whatever the case you’ve been dragging your feet a little bit, right?

I get it. I’ve been there countless times before. Even though I've been creating professional video content for over 18 years, it seems so much easier to make video content for other clients. When it comes down to my own personal DIY videos, the thought of rearranging my space, pulling out and setting up the equipment, creating and practicing the content, and even getting into the right mindset is a lot. Like a lot, a lot.

But after hearing so many excuses in my community about DIY video creation, I've decided to take everything I know and distill it down into bite-sized lessons to help you create better video content with ease… Because I want to be the support system and resource I wish I had. 

So let’s make a deal—right here, right now—let’s quit putting it off. Don’t let another year pass by without jumping on the video marketing boat! If you commit to upping your game, I’ll commit to sharing tips so you can do it on camera with confidence.

Whether it’s how to create video for Instagram, Youtube, or any of the other platforms, I hope you’ll allow me to help you get there. Let's do this together. What do you say?

If you like what you’ve heard and you want to learn more about how to create video for Instagram, Facebook, Youtube, or TikTok then don't leave without signing up for my * newsletter * to gain more "quickie" video tips, course content and exclusive video coaching offers that will give you the confidence to do it on camera.

Share Your Knowledge And Build An Audience With Tutorial Videos

108069998_l.jpg

Imagine your dishwasher springs a leak. Or maybe one of your cars headlights has gone out. Or maybe you ripped your favorite sweater! Do you pay a premium to have a stranger come into your home and charge you an arm and a leg for their industrial knowledge and $30 worth of parts, or find someone who does alterations and can piece your wardrobe back together? Or is your first instinct is to pull up YouTube and sift through tutorial videos to see just how hard it would be to make the repairs yourself?

If you answered the former, you certainly wouldn’t be alone – YouTube is now the second largest search engine in the world, and over half of adult users say it’s the first place they head when trying to attempt something they’ve never done before.

On the other hand, over 50 percent of all  adult users on YouTube is an enormous audience actively looking for tutorial videos. From mechanical repairs to crafts for children and getting creative in the kitchen – if you can do it, there’s an audience for it. All you need to be able to do is capture it on video.

How To Create Tutorial Videos From Scratch

How Do You Want Your Tutorial Videos To Look And Feel?

Deciding the overall purpose and tone of your channel is an important first step. Take some time to explore other channels and see what works, and doesn’t, for them. Consider whether or not you want to standardize your videos with the same introduction or title sequence, or if you just want to dive right in to the content. Different video structures work better for different projects and channels.

What Does The Ideal Basic Setup For Shooting Tutorial Videos Look Like?

86520424_l.jpg

Let’s take a look. To shoot your first video you’ll need:

  • A video camera (the one on your phone will do fine to start)

  • A tripod

  • A mannequin or large stuffed animal (if you’re framing shots yourself, you need a stand-in – if you have someone shooting video for you, skip this step)

  • A lapel mic

  • A computer with video editing software

  • Extra lighting (especially if you’ll be working with small pieces or in tight spaces, you want to be sure your viewer has a clear look at what you’re doing on camera)

Should You Write A Script For Your Tutorial Videos?

If your video requires narration, you’ll absolutely want to record it separately from the on-screen demonstration. This allows you to focus on the demonstration itself without having to talk the viewer through it at the same time. It reduces distractions and the number of final cuts you’ll need to make when editing the video. Can you imagine having to demonstrate a single step over and over because you stumbled over a word?

Writing your script after shooting the video also allows you to maximize your word economy. You can focus on conveying direct instructions and clear language – and not worry about rambling or getting off topic.

If you’ll be speaking on camera, make sure you use the lapel mic instead of the camera’s default microphone. You’ll cut down on ambient noise (is that the neighbor mowing his lawn in the background?) and prevent your audio from becoming muddled or fuzzy.

The Best Camera Angle For Tutorial Videos

111956931_l.jpg

To provide the best look at what you’re doing, set your tripod in a way that angles the camera as directly down over your shoulder as possible. This bird’s eye view will allow viewers the perfect vantage point to watch you work. With the right lighting, it also minimizes shadows and allows you to rearrange items or point things out with ease and clarity. Make sure you’re working on a neutral and uncluttered surface to avoid anything distracting from the tutorial.

If you need to address the camera, use the mannequin or large stuffed animal as your stand-in. Set it up and center and focus your shot on it before taking its place. Shoot a few seconds of test footage and take care of any final adjustments to camera angle, lighting or focus before you begin.

As you film, don’t be afraid to stop and start as needed. If you make a mistake, simply back up a step and do it again. You can seamlessly edit everything together in the final version. If your tutorial videos have a completed product at the end, make sure to take beauty shots from several angles to show it off at the end.

Editing Your Tutorial Videos Together

Paid video editors like Adobe Premiere and Final Cut Pro have so many great features. However, for beginners, a free program like Windows Movie Maker will do everything you need.

First import all of your video clips and any necessary audio files. Sort through everything and dispose of shots that you won’t use in the final tutorial. Decide what you want to cut, what you want to speed up or slow down, and what you want to leave as-is.

Lay everything out on the timeline in the order you want it. If you have a custom intro or outro, now is the time to decide where to put it. This is also when you should be adding captions or any other graphics you find necessary.

75960156_l.jpg

Once the video is done to your satisfaction, write out and record your script to match it. Use the lapel mic (or other microphone) to record the voiceover track and lay it on the timeline. Finally, if you want it, add a music track. Avoid anything with a copyright. YouTube has a library of free music that you can use, or you can purchase tracks from stock websites like 123RF and Shutterstock.

Happy with your final product? Export the entire project as a high-quality video file (MOV, MP4 and AVI are all commonly accepted) and upload it to YouTube.

Consider Keywords When Publishing Your Tutorial

Videos

YouTube has over 1.9 billion monthly users (just counting the ones who are logged in) with 400 hours of new video uploaded every minute. So how can you make sure your drop in the bucket makes a splash?

The most important step is to make sure you include the right words in your title, tags and description. YouTube’s search engine will match what users type into the search bar with what it can find in these text fields. By identifying popular keywords and using them in your descriptions, you help YouTube guide users to your video.

You want to make sure that your keywords are common searched for phrases, but not so generic that your tutorial videos will be lost in an ocean of similar content. For example, “how to make brownies” will return tens of thousands of results on YouTube – but “dark chocolate brownies recipe” significantly narrows the field.

Make sure to include what your video is about, and what viewers will learn by watching it.

What Makes Good (And Bad) Tutorial Videos

Even if you’ve barely scratched the surface of YouTube tutorial videos, it’s clear that there are some poorly-made ones floating around. Here are some things to consider that will help you avoid common mistakes.

Is Your Topic Appropriate For A Video Tutorial?

95973348_l.jpg

It can be tempting to think that any “how to” topic is a great choice for a video tutorial, but that isn’t so. For instance, topics that don’t have a strong visual component (think: How to Hire an Accountant or similar) could make a great blog article, but may not be well suited as video content.

Topics that are suitable have strong, compelling visuals to show off. Software and hardware how-to’s are great candidates, as well as cooking, home repairs and physical activities. If it requires you to show, rather than tell, you have a winner.

Keep Your Video Tutorial Short And Focused

Detailed explanations are fine, but shorter is definitely better with tutorial videos. Try to keep your video under five minutes. If you need more time, consider how you might break the project up into a video series instead.

This is especially important if you’re just starting out and trying to build an audience from scratch. Channels with an established audience have a little more leeway since viewers trust their content and know what to expect, but brand new channels will be better off delivering high value content quickly in order to keep attention from drifting.

Write Short Sentences With Simple Words

One of the best things you can do for your video is to make sure the language is clear, concise and impossible to misinterpret. In a video format especially, you can simplify your descriptions precisely because the primary focus is on showing – not telling.

If you will be putting a voiceover on your video (recording the audio track separately from the video), long sentences and complex words are harder to read out loud and will require multiple takes to say smoothly and clearly. A simple script also makes it easier to upload subtitles for your video which makes is popular on other platforms and necessary for hearing-impaired viewers.

Make Sure Your Picture And Audio Quality Are Good

Even more important than what you’re saying (and how you’re saying it) is the quality of how it looks and sounds. If the picture quality is blurry and the sound is either distorted or staticky, even the best content will be overlooked.

You can do without professional video equipment that costs thousands of dollars, but one small item that makes a huge difference is a decent microphone. Even an inexpensive one can improve your production values immediately. If you plan on making this an ongoing series a quality piece of equipment will be money well spent.

Let Tabrizi Help With Your Tutorial Videos

Tabrizi Productions excels and helping you get even the most complicated ideas across clearly. You can check out our portfolio of product explanation videos by clicking here and then contact me to talk about the vision you have for your next project.


Video Production Mistakes You Can Avoid Before They Happen Part 1

Whether you’ve been producing videos for years, or you’re just learning the video production ropes, there seems to be a series of common mistakes made over and over again. Not all of them are necessarily big or will significantly impact your video, but they can be easily avoided if you know what to look for.

Here is part one of our series on ten of the most common video production errors, and their solutions, from the online video hosting service Vidyard.

Top 5 Common Video Production Mistakes

1. Your Script Is Too Technical

45840478_l.jpg

Video production starts with the creation of a solid script. But for videos that explain a technical product or procedure, the writing process can be difficult. You need to find a balance of words that don’t confuse your viewer, but also don’t come across as condescending. If your script dives too deeply into technical jargon, you risk overwhelming your viewer and causing them to click away.

The Solution: Simplicity is key. Have individuals who don’t have a strong background in your video topic read your script and give you their feedback. You want to make sure they can understand the concept and tone, but don’t feel talked down to.

2. You Have Too Many Topics In One Video

It can be tempting to stuff all kinds of information into a single video, but don’t do it! Not only can this confuse and overwhelm your viewers, but it can ruin the overall flow. Just because your product has three different functionalities doesn’t mean you have to explain them all in one video.

The Solution: Instead of one overwhelming video production, create a video series. Multiple short, easily digestible videos are much more viewer friendly, and give you additional opportunities to build an audience as well as boost your overall marketing strategy. Check out my blog post on creating a video series by clicking here!

20039131_l.jpg

3. Your Audio Is Low

Quality

This mistake frequently occurs when music and audio combine. Your music sets the emotion or mood of your entire video production, and the audio explains the content. Each one has a role to play, so don’t let one overpower the other.

The Solution: Keep your music levels lower than you think they need to be and gently increase the volume during gaps in the voiceover.

4. Your Audio Is Out Of Sync

Even a few seconds of out-of-sync audio is enough to distract and annoy your viewer. If the audio is far enough behind the animation, your video production begins to look sloppy.

The Solution: Depending on the error and length, you may need to stretch or compact the frames to get the audio back in sync with graphics.

5. Your Graphics Are Too Flashy

Having a CGI-heavy video may look cool, but it usually doesn’t add to the story and can overwhelm and put off the viewer.

The Solution: Simple design and animation get the job done. Keep your video production entertaining and use the graphics to help support your message.

Stay Tuned For More Video Production Mistakes

These are five of the most common video production mistakes that we see across all genres. We’ll cover five more, including what can happen when your subject is too complex, in part two next week.

In the meantime, do you have an upcoming project that needs a professional touch? Contact Tabrizi Productions for a free consultation on how we can make sure your final product looks as professional and sleek as your business plan.

Platform by Platform – A Guideline to Video for Social Media

image1.jpg

Since 2016, the average dollar amount that companies are spending on video for social media has more than doubled. Video is a crucial piece in any social media campaign, taking up, on average, more than half of the funding in digital and mobile advertising budgets.

It’s a smart business move to invest, but where do you start? Formats change from platform to platform, and often even within the social media platforms themselves. Failing to find a “one size fits all” list of best practices is frustrating, so hopefully I can save you the legwork of needing to hunt down the specifics yourself with the information I’ve provided below.

Best Way To Handle Video For Social Media By Platform

Facebook

Optimizing your video for social media ads on Facebook can be tricky, mainly because of the many different ways that the platform delivers video to its users.

When you buy a video ad on Facebook today, its algorithm could place it in any one of a dozen different formats (desktop, mobile feed, side bar, messenger, etc). Learning the different flavors of Facebook video can help you customize the delivery format that matches your campaign goals.

  • Regular Facebook Feed

    • Recommended Size: 1280 by 720 pixels

    • Minimum Width: 600 pixels

    • Supported Aspect Ratios: 16:9 (horizontal); 2:3 (vertical); 4:5 (vertical); 1:1 (square)

Tips: For best results, Facebook recommends uploading videos in .mp4 and .mov format. Videos can be up to 240 minutes long, up to 4GB in size and have a maximum frame rate of 30fps.

  • Facebook 360 Video

    • Maximum Size: 4096 by 2048 pixels, 2:1 aspect ratio

    • Minimum Size: 600 pixels wide

    • Recommended Specs: .mp4 format, maximum file size of 1.75GB, maximum duration of 40 minutes, maximum frame rate of 60 fps.

Tips: If the camera you recorded your video on automatically includes 360 video metadata with the video file, you can upload it like you would with any other video. If it doesn’t, click the “advanced” tab when uploading to bring up Facebook’s “360 Controls” menu, which will let you convert unformatted footage into a 360 video.

  • Facebook In-Stream Ads

    • Minimum Size (landscape): 600 by 315 pixels

    • Minimum Size (square): 600 by 600 pixels

    • Recommended Size: 1280 by 720 pixels

    • Recommended Specs: .mp4 or .mov format, maximum file size of 4GB, maximum duration of 120 minutes, maximum frame rate of 30 fps.

Tips: For in-stream ads, Facebook recommends uploading the highest resolution source video available without letter or pillar boxing.

  • Facebook Messenger Ads

    • Recommended Size: 1280 by 720 pixels

    • Supported Aspect Ratios: 16:9 to 1.9:1

Tips: Facebook recommends uploading the highest resolution video available that meets file size and ratio limits. Videos can be up to 240 minutes long, a maximum file size of 4GB and a maximum frame rate of 30 fps.

  • Facebook Stories Video Ads

    • Recommended Size: 1080 by 1920 pixels

    • Minimum Size: 600 by 1067 pixels

    • Supported Aspect Ratios: 16:9 to 4:5 and 9:16

    • Recommended Specs: .mp4 or .mov file format, maximum duration of 15 seconds and maximum file size of 4GB.

Tips: Upload the highest resolution video possible and consider leaving the top and bottom 15 percent empty of important information to avoid being obscured by the profile icon or call to action.

  • Facebook Carousel Ads

    • Recommended Size: 1080 by 1080 pixels

    • Minimum Size (landscape): 600 by 315 pixels

    • Minimum Size (square): 600 by 600 pixels

Tips: Carousels let you showcase up to 10 images or videos in just one ad without having the user navigate to a new page. For best results use a 1080 by 1080 pixels square video.

  • Facebook Slideshow Ads

    • Recommended Size: 1200 by 720 pixels

    • Recommended Specs: .mp4 or .mov format, maximum file size of 4GB, a maximum duration of 120 minutes and a maximum frame rate of 30 fps.

Tips: Slideshow ads are designed for audiences with slower internet access. It allows you to transform a series of 3-10 images and a sound file into a video ad. For best results, make sure all your photos are the same dimensions. If you use different sizes the slideshow will be automatically cropped to square.

image2.jpg

Instagram

Instagram supports three kinds of video: square, vertical and horizontal. Square videos tend to be the most popular as they are more suitable for viewing on both desktop and mobile, take up more room in the user’s feed than horizontal feed, but don’t crowd the entire screen like vertical videos do.

  • Instagram In-Feed Videos

    • Square Video: 600 by 600 pixels

    • Horizontal Video: 600 by 315 pixels

    • Vertical Video: 600 by 750 pixels

    • Recommended Specs: .mp4 or .mov file format, maximum file size of 4GB, maximum duration of 60 seconds and maximum frame rate of 30 fps.

Tips: Instagram has the same recommendations for video as Facebook. Upload the highest resolution video possible that fits file size and ratio limits.

  • Instagram Carousel Videos

    • Recommended Size: 1080 by 1080 pixels

    • Minimum Size: 600 by 600 pixels

    • Recommended Specs: .mp4 or .mov file format, maximum duration of 60 seconds and maximum frame rate of 30 fps.

Tips: Like Facebook carousels, Instagram carousels let you showcase two to 10 images or videos in one side-scrolling ad.

  • Instagram Stories Video Ads

    • Recommended Size: 1080 by 1920 pixels

    • Minimum Size: 600 by 1067 pixels

    • Supported Aspect Ratios: 16:9 to 4:5 and 9:16

    • Recommended Specs: .mp4 or .mov file format, maximum duration of 15 seconds and maximum file size of 4GB.

Tips: These videos appear between Instagram user stories for up to 15 seconds (or until dismissed) and take up the whole screen. Because stories are tailored to the size of the device, exact dimensions are hard to predict. Upload the highest resolution possible and consider leaving the top and bottom 15 percent empty of important information to avoid being obscured by the profile icon or call to action.

apple-applications-apps-607812.jpg

Twitter

Twitter is optimized to handle video captured on mobile devices. If you’re uploading videos that were recorded a different way, be sure to consult Twitter’s detailed guidelines. For best results using video for social media ads on Twitter, upload the highest resolution you can under the file size limit (512Mb).

  • Twitter Horizontal Videos

    • Recommended Size: 1280 by 1024 pixels

    • Minimum Size: 32 by 32 pixels

    • Maximum Size: 1920 by 1200 pixels

    • Supported Aspect Ratios: between 1:2.39 – 2.39:1

    • Recommended Specs: .mp4 for mobile and .mov for desktop, maximum duration of 140 seconds and a maximum file size of 512MB.

  • Twitter Vertical Videos

    • Recommended Size: 1200 by 1900 pixels

    • Minimum Size: 32 by 32 pixels

    • Recommended Specs: .mp4 for mobile and .mov for desktop, maximum duration of 140 seconds and a maximum file size of 512MB.

apple-electronics-event-318540.jpg

Snapchat

One study found that Snapchat has the sixth highest concentration of millennials among major apps. With over 150 million daily active users and 7 billion daily video views, this platform has moved beyond its humble origins as a silly photo app.

  • Snapchat 10-Second Video Ads

    • Recommended Size: 1080 by 1920 pixels

    • Recommended Specs: .mp4 or .mov file format, between 3 and 10 seconds long and a maximum file size of 32MB.

Tips: These ads appear in discovery, in live stories or after a user’s own story, and can link to an app installation page, article or long-form video. Avoid placing logos or other important elements in the top and bottom 15 percent of the video to prevent them from being cut off. Snapchat also has detailed restrictions on the graphics and text that can be used in video for social media ads.

  • Snapchat Long-Form Video Ads

    • Recommended Size: 1080 by 1920 pixels

    • Recommended Aspect Ratios: 9:16 or 16:9

    • Recommended Specs: .mp4 or .mov file format, minimum duration of 15 seconds (no maximum) and a maximum file size of 1GB.

Tips: Long-form videos must contain “live and/or motion graphic video” with audio. Horizontal videos are allowed, but Snapchat strongly encourages using vertical videos exclusively.

YouTube

The second-largest search engine behind Google, YouTube is an essential network for video content. For marketers, YouTube is a great space to promote, educate and share video content around your brand.

  • Standard YouTube Video

    • Minimum Size: 426 by 240 pixels

    • Maximum Size: 3840 by 2160 pixels

    • Supported Aspect Ratios: 16:9 and 4:3

    • Recommended Specs: .mov, .mpeg4, mp4, .avi, .wmv, .mpegps, .flv, 3gpp or webm file format, maximum duration of 12 hours and a maximum file size of 128GB

Tips: YouTube encourages users to upload videos that are as close to the original, high quality source format as possible. Videos should never include letterboxing or bars since YouTube will automatically frame videos to ensure they are being displayed correctly without cropping or stretching.

  • YouTube Video Ads

    • Skippable ads: maximum length of 12 hours, skippable after 5 seconds

    • Unskippable ads: maximum length of 15, 20 or 30 seconds depending on region

    • Mid-roll ads: minimum length of 30 seconds

    • Bumper ads: maximum length of six seconds

    • Tips: YouTube announced in 2018 they would begin phasing out unskippable 30-second ads.

LinkedIn

Even though LinkedIn is still in its early stages of video content adoption, the network is still a go-to source for sharing. Nearly 75% of business executives say they watch videos online every week, and that number is only growing.

  • LinkedIn Shared Video

    • Maximum Size: 4,096 by 2,304 pixels

    • Minimum Size: 256 by 144 pixels

    • Supported Aspect Ratios: 1:2:4 to 2:4:1

    • Recommended Specs: .asf, .avi, .flv, .mov, .mpeg-1, .mpeg-4, .mkv, and .webm file format, a maximum file size of 5GB, a maximum duration of 10 minutes and a maximum frame rate of 60fps.

iamge3.jpg

How Long Should Video for Social Media Be?

Just because YouTube allows a maximum of 12 hours of video doesn’t mean you should start editing together that real-time runner’s marathon feature. There are definitely best practices to follow when it comes to using video for social media, but they are best summed up in the phrase, “Less is more.” You can dive deeper in my blog post on the subject, but here is a quick overview.

  • Facebook – 1 minute

    • Facebook audiences like to engage most with videos that are just one minute long. Users like snappy videos that they can quickly like or share before moving on.

  • Instagram - 30 seconds

    • Instagram videos that received the most comments averaged just 26 seconds. Our brain processes visuals 60,000 times faster than text, so users scroll faster on Instagram than any other app.

  •  Twitter – 45 seconds

    • Twitter’s video of the day averages just 43 seconds. Users are accustomed to short tweets, so make sure the brevity also applies to videos.

  • YouTube – 2 minutes

    • The videos that receive the most engagement on YouTube are about two minutes. Users like spending time on this platform because they can easily find specific videos and watch their favorite creator’s content. Developing longer, more in-depth, content is perfect for this platform.

  • LinkedIn – 15 seconds

    • According to LinkedIn, the most successful video ads are less than 15 second long. The platform recommends no longer than 3o seconds for brand awareness and consideration videos, and 90 seconds for videos that meet upper-funnel marketing goals.

Let Tabrizi Help With Your Video For Social Media

I strongly encourage you to bookmark this blog and use it as a reference for your next social media video campaign! Of course Tabrizi Productions can work with you every step of the way to make sure you’re set to make a splash with your video for social media. Contact us today to get started!

A Homepage Video: How To Make An Unforgettable First Impression

For the vast majority of visitors to your site, your homepage video is the first experience they will have with your business and your brand. That’s why it’s so important to make a positive first impression that sticks in their mind – before they click away and get distracted by e-mail, social media or, worst of all, your competitors.

115349967_l.jpg

There are a million different ways to craft a delightful introduction while also driving conversions, but there are also some painful mistakes that will drive potential people away. So, without further ado, here are some valuable do’s and don’ts for your homepage video from the video software and hosting company Wistia.

Do Make Your Value Clear In Your Homepage Video

Make sure you quickly answer the question that everyone wants to know: What does your business actually do? Few things are more frustrating than visiting a website, clicking through their content, and still having no idea what exactly their business is all about.

Use your homepage video to highlight your key points in a casual but informative way. What problem do you solve? How will your product or service change things? Speak in a way that will resonate with your target audience, be clear and conversational, and get to the point.

Do Know The Audience You Are Targeting With Your Homepage Video

For first-time visitors, your homepage video is your chance to nail first impressions. Incorporate key elements of your brand and try to create a consistent theme that’s reflected in the rest of the content throughout your site.

By knowing your audience well, you should be able to pick out some of the elements of your brand that will resonate with them. Your homepage video is a unique opportunity to engage with your viewers, showcase your brand and leave a lasting impression. Consider featuring some of the people who work at your business to give viewers a better understanding of who makes up your business, and help them focus on emotion instead of numbers.

Do Test Out Autoplaying Homepage Video

The expert debate on whether or not to autoplay video is a heated one. Some marketers support it for its immediacy and effectiveness, while others hate that it takes the choice away from the viewer, slows down the website’s load time and can be generally annoying. The reality is there’s no right answer. The best way to find out what works for your website is to test it both ways and see what the analytics say gets the best response.

If you decide in favor of autoplaying your homepage video, here are some tips to minimize the annoyance risk factor:

·         Keep the video short and sweet

·         Don’t show too much motion

·         Keep everything else on your page static

·         Make your video silent or sound optional

Do Put Your Homepage Video Front And Center

If you’re going to put video on your website’s homepage, don’t make your visitors scroll to find it! Since web video is such a strong driver of conversions, your video should be featured front and center.

You should also look at the rest of the content on your page, to make sure your video doesn’t have to compete with other design elements.

Here’s an example of a home page video created by Tabrizi Productions for RF and microwave technology company Marki Microwave.

Don’t Set Broad Goals For Your Homepage Video

Your goals can change, but they should always be targeted! If you need some help getting on track, give the SMART formula a try. Your goals should be:

·         Specific - Ask yourself what exactly you hope to get out of your content marketing technique.

·         Measurable - In order for your goals to be successful, you need to be able to measure them against some benchmark.

·         Attainable - Make sure your goal is reasonable and don’t set the bar too high.

·         Relevant - How will the content marketing technique help your customers and your company?

·         Time-bound - Make sure you do set a time limit to reach these goals. Not setting a deadline for success will make it hard to measure your results.

Keep in mind also that your video doesn’t need to do all the work. It may be what gives visitors their first impression, but all other content on your site should also be a part of that SMART formula.

Don’t Get Too Detailed In Your Homepage Video

It might be tempting to try and squeeze in every last detail about your business into your homepage video, but please don’t! For almost every homepage video, a length of two minutes or less is ideal. This type of content should be more like an appetizer for your business – not the whole meal. If your viewers want more information after watching your it, there are other places on your website where they can get it.

Research shows that the best videos are between 15 seconds and two minutes in length depending on its purpose. According to Wistia’s Ezra Fishman, “Two minutes is the sweet spot. After that, the drop-off in engagement is significant.” Ezra goes on to say, “Short and sweet is a safe strategy. Assume that your viewers are busy. But don't sweat over a few seconds here and there if you're still going to come in under the two-minute mark.”

Avoid using a strong call to action in the homepage video, too. How would you feel if someone said hello and then immediately asked you to buy something or make a donation? At most, you want to pique viewer’s interest, develop brand interest and provide the must-know details.

Here’s a refresher from the Tabrizi blog on how to you get your message across in two minutes or less.

  • Know The Purpose of Your Video. In order to clearly communicate with viewers, you need to know the purpose behind your message. What is it that you want them to take away from your video?

  • Write Out A Script. A script will help you keep focused on the purpose of your video and the main message you want your audience to know. As you write your script, try to include as many of the five W’s as possible - Who, What, When, Where and Why, as well as the How if it makes sense.

  • Practice, Practice, Practice! The more you practice your script, the easier it will be to get your message across confidently and within two minutes when it’s time to record. I recommend practicing in front of a mirror and for family or friends a couple of times before you record.

Don’t Sacrifice Good Copy Because Of Your Homepage Video

Even if your homepage video knocks it out of the park, there’s no reason to leave the rest of your homepage text free. For SEO purposes, if nothing else, text is necessary. If your video doesn’t autoplay, you’ll want copy that persuades visitors to watch it. If they don’t watch the video, your copy needs to do the job of grabbing attention and getting your message across.

Action-oriented words like click, start, download, register, sign up or try are also effective at driving a specific action, so be sure to incorporate those on your homepage in addition to your video.

Don’t Let Your Homepage Video Get In The Way

Ultimately your homepage is just a gateway to the rest of the site, designed to encourage further interaction. A homepage video should assist with that – not deter it. If you worry that an autoplaying video will turn visitors away, consider making it silent or using music with text titles instead of a voiceover.

A Positive Customer Experience Comes First

If you’re ever struggling with what to do, just consider the viewer’s experience above all else and let that guide you. Video is just one of the elements that makes up a successful homepage, but it may be the reason yours stands out from the rest. First impressions are crucial and video makes an instant, memorable impact.

Do you want help creating a homepage video that will make an unforgettable first impression? Contact Tabrizi Productions today for a consultation.

Get Professional Video Visuals With Ease And Affordability (Part 2)

In Part 1 we covered how to choose your location and frame the best shots. Now we wrap it up with lighting and wardrobe!

camera-contemporary-flash-134469.jpg

Make Your Video Visuals Pop With Good Lighting

The right lighting helps to set the mood and ensure your viewers can actually see what you want them to. There’s a lot you can do with a budget camera or even your phone, but if you’re trying to shoot a video in the dark it just isn’t going to happen.

So how do you decide what kind of lighting kit you’ll need? There are a lot of options and plenty of confusing terminology, but for most scenarios one of these setups suggested by Biteable is all you need.

Two Or Three-Point Lighting

A three-point lighting setup is the standard for most basic filming. As the name suggests, it’s accomplished using three lights:

Key light: The key light is the strongest, providing most of the light in the shot. It’s generally placed in front of your subject, around 45-degrees above and 45-degrees to the right or left.

Fill light: This is a softer light, used to fill in shadows on the subject’s face. It should be positioned to the side, opposite the key light. The intensity of the fill light is usually around half that of the key light.

Back light: The back light creates depth and provides a soft glow in the background. It’s placed above and behind the subject, and out of the shot.

If you’re just getting started with lighting or have a limited budget, you can get by with a two-point setup that uses just the key and fill lights. While the back light adds a nice depth to your background, it’s not necessarily essential.

Natural Outdoor Lighting

If you’re shooting outdoors or in a space with very large windows, you can use the sun’s natural light to illuminate your scene. Photographers and filmmakers love the “golden hour” in early morning and late evening for its soft and flattering golden light.

There are drawbacks to relying on natural light however. The sun can be too intense, casting harsh shadows on your subject. It also moves and changes in intensity as the weather shifts and clouds pass overhead. All of these can affect the light and color quality and make it difficult to achieve consistency in your shots, but with careful planning and adjustments you can certainly pull it off.

Many video makers who use natural light like to use a variation on the three-point lighting setup described above. You can place your subject so the sun provides your key light, with reflectors to provide fill and back lights.

During the golden hour, when light is softer, the subject can also be positioned in front of the sun, using it as a back light, with reflectors providing the key and fill lights. You’ve just got to be quick before the light changes too much.

Wardrobe Is The Cherry On Top Of Video Visuals

You’ve picked your location, set up the lighting and framed the shot – all that’s missing is your subject. Make sure that they always look their best and that their clothes don’t distract from the rest of the scene with these tips from personal stylist and branding consultant Nicole Otchy.

33726193_l-1.jpg

Wear Jewel Tones Near

Your Face

The colors near your face will either drain you of life or highlight your best features. There’s a palette of colors that look best on each of us and especially great on video. Ruby red, emerald green, and sapphire blue are highly saturated colors, so they don’t appear too bright or too muted against most backgrounds, and they look great with all different skin tones.

Be Careful With Black

When it comes to wearing black on camera, avoid it altogether unless you plan on having your makeup done by a professional who can color correct for shadows on the face. Wearing black on camera can make dark circles appear more pronounced, giving you a more tired look. If you really want to wear a dark color on camera, navy is generally a safer choice.

Choose Simple Fabrics

Looking like a disco ball on camera is not always the best style to shoot for. Shiny fabrics, especially under bright lights, are usually less than flattering. Thick cottons and matte fabrics, on the other hand, dampen shadows and can create a smoother body profile line.

Keep It Modern

Another advantage of wearing solids is that your videos won’t look dated as quickly. That vintage pant suit you thrifted last week? Keep it in your closet. Rich, saturated colors never go out of style, so it’s best to keep it simple.

Use Patterns Sparingly

Patterns that look great in person don’t always translate well on camera and can be distracting. Avoid small, busy prints (think paisley or small polka dots), which can look blurry on video. Other patterns like pinstripes, chevron, plaid and houndstooth are also difficult to see on video and can make your viewers dizzy.

Choose Your Backdrop Wisely

The color you shoot your video against will impact how a color that you’re wearing translates on camera. Colors set against a white background will appear brighter, while colors set against a dark background will lose some of their intensity.

Let Tabrizi Help!

Strong visuals are a vital part of polishing even the most straightforward of videos. Even something as basic as instructions or corporate onboarding can be improved with these techniques.

Tabrizi has the tools and the knowledge to make sure your videos show off your project in the best light. Contact us for a free consultation and let’s start planning! 

Get Professional Video Visuals With Ease And Affordability (Part 1)

Want to create a polished, professional video that makes your audience believe it came from a professional studio? It’s easier than you think. Instead of dropping thousands on top-of-the-line equipment, try these easy and affordable (free is definitely affordable) techniques to take your video visuals to the next level.

Choose A Location That Matches Your Desired Video Visuals

The location of your video will help set the mood and tone and everything that follows, so you want to make sure you have the right one. Are you talking about extreme sports? Stay out of the board room! Is this a corporate onboarding video for new employees? The middle of your nearest park probably isn’t the best choice.

 Videomaker Magazine has some great tips on how to scout the best spots, and what to look for before making a decision. Here are a few of the most useful:

1.      Know Your Script

Choose a site that matches the tone of your video. As you set out to look at locations, you have potentially endless possibilities. Remember that above all you have a story to tell, and choose a location that lends itself to that. Don’t let your location limit your story, instead.

2.     Scout At The Right Time

blur-close-up-direction-919188.jpg

Be aware that locations can change. It's wise to check your spot on the day of the week and the time of day that you'll be taping: these factors can produce surprisingly large changes on the suitability of a location.

Automobile traffic and noise, visitors to recreation and entertainment spots, and tourists at scenic or historic areas (to name just a few examples) all come in waves that vary dramatically based on the time of day, the day of the week and the season.

3.     Look At The Light

Churches, ballrooms, restaurants, auditoriums and homes generally feature low amounts of available lighting. Check light levels by shooting a few seconds of test footage with your camcorder.

Solutions for poor lighting might be as simple as scouting out window blinds and curtains that can be opened to add daylight. In some cases you may wish to bring in lights or ask permission to replace the bulbs in accessible light fixtures with brighter-burning units.

4.    Follow The Sun

Outdoor lighting conditions can be as challenging as those indoors; exterior illumination changes all day long. As you're scouting locations, pay attention to whether a given spot is in full sun, partial sun or full shade. Bright sun can be harsh on people's faces, and light-colored surfaces can blow out in full sunlight, causing automatic camcorder lenses to underexpose shots. Partial sun can be tricky, as well; today's camcorders, though sophisticated, can have trouble handling the high contrast in this situation. Ultimately, you may find that fully shaded locations or overcast days produce the most consistent results.

5.     Listen

Clean, high-quality sound is critical in making a video that rises above the ordinary, and it’s silence that ensures you get the location sound that you came for.

The whooshing of traffic, the white noise of moving water, and the echoes of voices and movements can all get in the way of high-quality audio. As you scout a location, check for any of these conditions by listening to your camcorder's microphone pickup through headphones. Test your wireless mike at the site as well, listening closely for any type of interference.

6.    Check For Power Supplies

Many outdoor locations are far from power sources and even some indoor locations can pose AC challenges, so multiple camera batteries are always a good idea. But you'll still need to evaluate your power options at any location.

How will you power your lights? What if you do end up draining all your batteries? Is there anywhere to plug in the charger? Is the spot remote enough to make a car-lighter AC adapter a good idea? In a location that does have power, you may be able to plug in, but you'll still need to think about the system's pre-existing load and whether or not you can get to the fuse (breaker) box in case something blows.

Set Each Shot With Video Visuals In Mind

Even if you’re not setting out to make a contender for next year’s Academy Award for Best Cinematography, how you construct your individual shots can go a long ways towards raising the quality of your video.

Framing

Premium Beat, a great resource for royalty-free music, also has some great resources on their blog for video production.

1.      Use The Rule Of Thirds

The rule of thirds simply states that you want to think of your shot in three main parts: left, center and right. You can take this one step further by composing your shot vertically as well, breaking it into top, middle and bottom for a total of nine individual segments.

Placing your main object in one of the main thirds will go a long way towards framing a technically sound shot. There may be times when you want to go against the rule of thirds, but it should always be a calculated choice and never because of lazy technique.

2.     Create Symmetry (Or Asymmetry)

architecture-building-business-1583765.jpg

Creating symmetry is one of the most effective ways to frame a shot that will feel well composed on a screen. Symmetry provides the viewer with a sense of balance that subconsciously allows them to become immersed in what they are watching – drawing them further into the characters, setting, or scene by the leading lines in the frame.

On the other hand, images that are intentionally off balanced will create a sense of disconnection and instability for the viewer, which can work well for horror, thriller, or high action.

3.     Avoid Eye Level Shooting

Placing the camera at eye level with your subject can leave the scene feeling sterile and unemotional. It can work well for videos that are intentionally benign, or for a documentary-style shoot, but in most instances your best bet is to place the camera slightly above or below eye level.

That slight angle can help you either diminish or empower the character on screen, and guide the emotional experience of your viewer.

4.    Have A Theme

It’s important that you have a theme or guideline for yourself when setting out to shoot any project. An example of a visual theme or motif that you might choose to explore would be empty space.

Let’s say you are shooting a film that deals with very lonely characters that feel isolated from each other. It would be a great visual choice to shoot them with lots of open, empty space on either side of them so that their loneliness and isolation is conveyed to the viewer effectively. You also might choose to frame the characters in single shots, as opposed to two shots, since that will also make them feel more disconnected from each other.

This clearly is just one example, but the point is you want to pick a theme and run with it – whatever it may be, to ensure that you are creating a distinct visual style that is unique to your film.

5.     Shoot With Intention

Think about every single one of your shots and consider how you want it to add to the story you’re trying to tell. If you’re going to break the “rules,” make it intentional. By understanding the purpose behind the rules you are breaking, you will understand the effect your approach will have on the audience and the meaning behind your intentions will be felt.

IMG_3039.JPG

Background

It only takes a second, but if you don’t catch a mistake in the background while you’re shooting it could haunt you every time the video is watched. Don’t believe me? Check out this list from Cracked that points out glaring mistakes in some pretty big movies.

Take a close look at the shot through your camera and make sure there is nothing awkward in the background that gives your actors antenna, or makes it look like buildings and trees are sprouting from their head.

Part 2 Is Coming

There’s so much great information to go over still, make sure you stay tuned for part two!

Spit It Out! Why Shorter Is Better With Online Video

Which Came First: The Video Platform Or Viewer’s Attention Span?

All you have to do is look at the top social media platforms today to see the trend in current online video: shorter is better. The average YouTube video length is four minutes. Instagram limits their videos to 60 seconds in the main feed, and 15 in Stories. Snapchat recently upped their maximum limit to 60 seconds from the original 10, and Vine, no longer an active platform, limited their videos to a blazing fast 7 seconds.

Regardless of whether video lengths influenced the viewer’s attention span, or vice versa, the evidence remains that if you don’t hook your viewer by the end of your opening lines, they start tuning out fast. Even with videos one minute or shorter, only 60 percent of viewers will reliably make it to the end, and twenty percent of them will have given it a pass in the first 30 seconds.

The name for the number of seconds viewers tune in for is called “watch time.” Knowing what yours is, and how you can work with it, can change your video strategy entirely.

How To Find Your Video Watch Time

Depending on where you upload the majority of your videos, you may have to look in different places for your watch time analytics. Platforms like Vimeo and YouTube have their own analytics built right in that you can access from your account. If you are uploading videos directly to your website, you will likely have to find a third-party platform like Google Analytics, SE Ranking, Woopra, or many others

Any of these will be able to give you a look at your views per video, the average watch time of each of them, the time of day most of your viewers are online, and other numbers to help you zero in on best practices.

Script Your Video With Watch Time In Mind

According to a survey done by production company Vidyard this year, the average company published 33 videos each month – an increase of 83 percent over the same period of time in 2017. Of those, 75 percent of the videos were under two minutes.

So how can your video make the most out of an inattentive audience? Try these tips from marketing company MiniMatters:

  • Shorter is better. If you can make the same points in less time, do it!

  • Start off energized and get the important stuff in at the beginning of your video before your audience starts to disappear.

  • Don’t hold your call to action for the end, especially for longer videos. Consider a clickable pop-up that appears in the first few seconds and throughout the video.

  • Think about breaking a longer video into a series of shorter, easily digestible, clips.

Make Sure Your Video Matches Your Platform

Just like there is no one way to view a video, it would also be foolish to assume the same video will work on all platforms. Here are the best lengths for each of today’s popular video platforms (via Hubspot):

  • Instagram - 30 seconds

    • Instagram videos that received the most comments averaged just 26 seconds. Our brain processes visuals 60,000 times faster than text, so users scroll faster on Instagram than any other app.

  • Twitter – 45 seconds

    • Twitter’s video of the day averages just 43 seconds. Users are accustomed to short tweets, so make sure the brevity also applies to videos.

  • Facebook – 1 minute

    • Facebook audiences like to engage most with videos that are just one minute long. Users like snappy videos that they can quickly like or share before moving on.

  • YouTube – 2 minutes

    • The videos that receive the most engagement on YouTube are about two minutes. Users like spending time on this platform because they can easily find specific videos and watch their favorite creator’s content. Creating longer, more in-depth, content is perfect for this platform.

The Takeaways

Keep your video short, sweet and front loaded with information! That way whether they stick around for the entire thing or not, you’re guaranteed to get the most information in front of your viewer as possible.

If you want some help putting together a video or video series for your business, contact Tabrizi Productions today! We can help you with scripting, shooting and editing to make sure your videos make the best impression possible.

HOW TO GET YOUR VIDEO’S MESSAGE ACROSS IN TWO MINUTES OR LESS

Learn how to get your message across in two minutes or less.

Learn how to get your message across in two minutes or less.

If you've been reading my other blog posts, you've learned different ways to use video for business, which platforms you can use, what it takes to create an intro video that stands out, and more. It's a tool that every business can and should take advantage of. No matter the type of video you choose, you need to make sure you stay focused on the message you want viewers to walk away with.

Research shows that the best videos are between 15 seconds and two minutes in length, depending on their purpose. According to Wistia's Ezra Fishman, "Two minutes is the sweet spot. After that, the drop-off in engagement is significant." Ezra goes on to say, "Short and sweet is a safe strategy. Assume that your viewers are busy. But don't sweat over a few seconds here and there if you're still going to come in under the two-minute mark."

Watch this video we created for a terrific example of how to stay on the message, then continue reading to learn a few tips that will help you keep your video in the sweet spot.

How to Share Your Message in Two Minutes or Less

1. Know The Purpose of Your Video. In order to clearly communicate with viewers, you need to know the purpose behind your message. What is it that you want them to take away from your video?

2. Write Out A Script. A script will help you keep focused on the purpose of your video and the main message you want your audience to know. As you write your script, try to include as many of the five W's as possible - Who, What, When, Where, and Why, and the How - if it makes sense. And don't forget the call to action at the end!

3. Practice, Practice, Practice! The more you practice your script, the easier it will be to get your message across confidently and within two minutes when it's time to record. I recommend practicing in front of a mirror and for family or friends a couple of times before recording.

Remember, videos under two minutes have the most engagement; to get your message across quickly, keep your video's purpose in mind, write out a script and spend some time practicing.

Do you want help creating a one-of-a-kind masterpiece to showcase your business? Let Trabrizi Productions help! 

Tabrizi Productions is a boutique video production company with a mission to make video accessible for all. We offer authentic, affordable video storytelling for companies large and small.

Tabrizi Productions has worked with some of the biggest names in Silicon Valley and the surrounding South Bay Area.

We serve Oakland, Palo Alto, Santa Clara, San Francisco, San Jose, San Mateo, and the surroundings of the Silicon Valley area. Sound like a fit

Contact us today for a free consultation to find out what we can do for you!

3 ESSENTIAL ELEMENTS YOU NEED TO INCLUDE IN YOUR INTRO VIDEO!

44675247_l.jpg

How do you introduce your business on your website? Do you provide some basic text and images? Or do you include exciting elements like animated graphics and video? While many companies rely on just text and images on their website, I highly recommend creating an intro video! Do you want to know why? Keep reading to find out why and to discover the three essential elements every great intro video includes!  

why you need an intro video

An intro video is your chance to make a strong, personalized first impression with new customers when they visit your site. As with first impressions between people who are face to face, an intro video will have a major impact on the course of your relationship with viewers, and you only have a brief moment to make it a positive one. But why should you have a video? Why not wait until they call or visit your location? Here are a few key statistics Forbes highlighted that show just how powerful video is:

  • During the decision-making process, 90% of people said they chose a product or service because of a video they saw.

  • Conversion rates increase up to 80% when you include a video, such as an intro video, on a landing page.

  • More than 60% of people are more likely to buy a product online after watching a video.

  • Using videos will help you gain more than a 4o% increase in web traffic from search engines than companies that don't use them.

  • When given the option between reading about a topic and watching a video, most would choose to watch the video.

  • Video consumption will account for 80% of internet traffic by 2019.

  • 55% of people watch videos online every day.

As you can see by these statistics, incorporating video into your business plan is becoming more important, and an intro video is a perfect opportunity to jump on board.

3 common types of intro video

When it comes to creating an intro video for your business, there are a few directions you can take it. Determining the goals for the video (an essential element that we will discuss further in this post) will help you narrow down which option, or a combination of options, would be the best fit. Here are three of the most common types of intro videos you can create for your business.

1. Welcome. This is the basic type of intro video that any can use, from small startups to large enterprises. In this video, you should tell visitors who you are, what your brand is, and how you're different. By the time people are done watching, they should have a strong vision of you and your business.

In these videos, it's important that the tone and feel you present matches the rest of your brand. If your company is lighthearted and embraces humor, don't be afraid to use this in your video. If your brand is more serious and technical, make sure it stands out through your appearance and language.

2. Testimonial. Your client's opinion of your business is powerful! Where a welcome video is you talking about your brand, in a testimonial intro, your customers speak to what makes your business the one to work with. Don't be afraid to reach out to past clients to ask them for their help. Their word is viewed as more reliable and trustworthy to those just coming across your business for the first time.

3. Portfolio. Don't just talk the talk; show that you can also walk the walk with a portfolio intro video. This is a fantastic opportunity to show off the projects you're most proud of and highlight your range of skills. While you don't want to come across as bragging and arrogant, you want to make it clear you know what you're doing and are the best company to fit your visitor's needs; a video of your best work is the perfect way to share this.

All three of these options can stand alone as their own individual videos, or you can spice things up a bit by including a mix of the different options! Don't hesitate to play with ideas that work for your business, but make sure you keep your target audience in mind as you do.

A portfolio video is a great way to show off your skills, like this one featuring our ability to create animated videos for a wide range of products and services.

Essential Elements of an Intro Video

No matter the type of intro video you choose to create, there are a few elements that you need to include. They will help keep your focus on the video's objective, allowing you to make the best first impression with potential new clients.

Have a Goal: What's the goal of your video beyond introducing them to your brand, services, and team? Your goal needs to be specific and measurable while relating to the type of video you want to create. A great way to narrow down what you want to achieve from your video is to ask yourself questions like these:

  1. Do I want people to explore my website?

  2. Do I want them to contact me?

  3. Do I want viewers to purchase my products or services?

Once you know the type of goal you want to achieve, how much of an increase do you hope to see, and in what time period? As a word of caution, make sure your goals are realistic and achievable. Creating unrealistic goals sets you up for disappointment when you don't achieve them.

tabrizi.jpg

Create a Script: Before you start recording, it's important to know what you want to say and how you want to come across. A script will help you figure out what you want your viewers to know and will help you organize your thoughts in a way that makes sense. Here are a few considerations when putting together your script.

Know Your Audience: The audience is an essential element of your video; after all, the video is for them. How can you help them if you don't know their needs? If you want help determining who your target audience is, CoSchedule recommends you ask yourself these questions:

  1. What problems can my product or service solve for customers or clients? At its core, this should answer the question of why your company exists and why people need it.

  2. What does my current client base look like? Consider areas like age, gender, location, family structure, income, and education level.

  3. Who is my competition, and what does their customer look like? You should know who the larger competition is, but don't forget about the smaller guys that are just starting.

  4. What can my customers gain by choosing me versus my competition? What can you do better than anyone else in the market? Determining this will help you showcase a specific need that you fulfill.

Focus on Your Brand: While you want to make sure you're speaking to your audience with a specific goal in mind, you don't want to lose sight of your brand. Focus on what makes your business different from the rest and how you can meet your audience's needs.

Keep to the Point: Don't get bogged down in every little detail about your brand. In this case, less is actually more. You have a limited time to share your company, and too much information can overwhelm your viewers or, even worse, bore them.

Add a Human Touch: Don't forget that your business is full of unique and special people. Let this shine through in your video. Including a human touch in your video makes it more relatable.

Before you start recording, don't forget to practice, practice, practice! The more you rehearse, the more comfortable you'll be once you do start filming, and you'll also come across as more confident.

Include a Call to Action: This is your chance to ask your viewers to take a specific action with your brand. Remember the goal you created earlier? Use it as the basis for your call to action. Like your goal, the call to action should be a very specific action you want your viewer to take, whether it is contacting you, visiting a certain page, or filling out a form on your site. While you want your call to action to be specific, you want to give your viewers incentive; let them know what's in it for them when they take action and what benefits they will receive as a result.

This informative video for Marki Microwave incorporates the essential elements of a successful intro video.

Conclusion

One of the best tips I can offer beyond making sure to include these elements is to remember to breathe and relax while you're recording. This should be a fun and exciting experience that highlights what makes your brand the best one to work with.

Your intro video will set the tone for your future relationship; start it off on the right foot with the helpful advice in this article. Want to create an eye-catching intro video but feel like you need help? 

Tabrizi Productions would love to help you build your video marketing strategy and highlight what makes your business special 

Tabrizi Productions is a boutique video production company with a mission to make video accessible for all. We offer authentic, affordable video storytelling for companies large and small.

We are locally serving Oakland, Palo Alto, Santa Clara, San Francisco, San Jose, San Mateo, and the surroundings of the Silicon Valley area. Sound like a fit? Fill out this form to schedule a free consultation. 

How to STAND OUT with Your Video Content

Ready%2Bfor%2Bmy%2Bcloseup.jpg

Smartphone Setup Cheat Sheet at bottom of page!

Take the plunge and start creating your digital content

Video content is a powerful and dynamic tool for your brand. A strategic video can serve your business’ branding, advertising and recruiting needs – a dynamite combo for small businesses.  And with YouTube and other digital video content topping more hours watched per day than television, the potential exposure for your business is tremendous and still growing. Keep reading to learn how to create a video that grabs your customer’s attention.

1. The Video Setup

The right video setup is crucial because it will give you the best material to work with in the later stages of your video’s production. Be sure your setup includes:

·         A quiet room with natural light that hits the subject directly

·         A camera or phone that shoots in 1080p or 4k

·         An inexpensive tripod for video consistency

Why? When it comes to creating video, people have the tendency to jump into recording without investing time in the right setup. First, choose a space that is quiet and has natural light. Adjust your camera’s subject, so the light hits them straight on and not from the back or sides.  

You can purchase a professional camera, but today an iPhone is also able to capture higher quality footage in 1080p or 4k.

Consider investing in a tripod to prevent that inevitable handshake. A few inexpensive tripod recommendations are listed at the bottom of this post. Another helpful tip for production consistency is to mark on the floor where the tripod will stand a…

Consider investing in a tripod to prevent that inevitable handshake.  A few inexpensive tripod recommendations are listed at the bottom of this post.  Another helpful tip for production consistency is to mark on the floor where the tripod will stand as a reference for future shots. Finally, make sure to orient your phone or camera horizontally to capture a video that will look great on a big screen.

2. Techniques to STAND OUT

You can create stand out content by trying the following:

·         Bring the right energy

·         Capture ‘first-hand’ experiences

·         Engage your audience and learn their interests

After the strategic and technical video setup, the most important technique for your video is an often-overlooked component – bringing the right energy to your content. Just as you are able to tell if someone is having a bad day or is utterly elated when you see them in person, the same energy is transferred on screen. Speak clearly and with authenticity about your business, and avoid being overly excited or nonchalant.

Keep in mind most people have a hard time watching themselves at first, but it’s something you'll become more comfortable doing with time and practice. Don't be afraid to take the plunge and start creating digital content; you'll improve your presence the more you film. 

Intriguingly, with the advent of virtual reality and live streaming experiences, videos that offer a ‘first-hand’ impression are gaining traction.  Consider content that shows consumers reacting to your product or highlight your team solving a production problem.

Another technique to capture your audience’s attention is to engage with them. Start by asking them to contribute video ideas, then use those ideas as research to fuel more content that is likely to interest your market. Rather than worrying about reaching thousands of viewers, start by creating content that authentically speaks to your consumers and their enthusiasm will help your content garner more attention.

3. Post-Production Tips

When it comes to work in post-production (or, after the video is recorded), take these steps:

·         Maintain the video quality during file transfers

·         Check if someone on your team has experience with iMovie

·         Create a strategy for publishing your business’ video content

As director Inarritu put it, “Movies become art after editing.” There are many tips and tools that exist for the art of post-production. Yet, the most important element is the quality of the video material itself. Be sure to transfer your footage directly with a USB or cloud storage upload rather than emailing or texting the file, which risks a reduction of the file’s quality. 

2image.png

iMovie, one of many fantastic editing tools for consumers, is a video editing platform that is free to use with Mac hardware. The platform's software offers a manageable learning curve; in fact, there is likely someone on your team who has experience using iMovie in their personal lives. If your team feels out-of-water in the editing process, consider outsourcing to a professional or contact Tabrizi Productions for a video editing consultation.

Once your video footage has been edited, create a strategy for sharing your content on social media. Will you publish the video on Vimeo or YouTube? Choose a day of the week to consistently publish your video content and post social media updates about the video to your customers. Studies have shown that the best day to publish videos on YouTube are Thursday and Friday between 12-3pm and Saturdays from 9-11am. 

Final Takeaways

When thoughtfully produced, your business’ video content can speak volumes about your brand. If you capture quality footage and capture your brand’s voice authentically you’ll be sure to stand out in the crowd of video content. For more technical insights when using an iPhone, download my iPhone cheat sheet for free!


Tripod Recommendation

Tripod Recommendation

SmartPhone Cheat Sheet